Easy app walkthroughs with MarkWalkthrough
Some time ago, while I was working on my app Rex Tables, I wrote some quick code that reads a Markdown file with some “slide” data and automatically displays an app walkthrough.
It wasn’t really meant for other people to use since it made use of a paid Swift package for the transition effects in the walkthrough. But that package, namely Pow, just become open sourced last week!
So I pulled the code out of Rex Tables and did a quick pass to tighten up a couple of things and pushed it to GitHub.
I think the package is more of a fun experiment than something a big number of people will want to use in their apps but nevertheless — here’s MarkWalktrough!
MarkWalkthrough
The package exposes two types — a data model you initialize with a Markdown file and a SwiftUI view that renders the “slides”.
Let’s look at the model first.
Initializing the model
You create the model and pass in a URL like so:
|
|
The Markdown file should contain a table with the following columns for the model to read:
| image      | sticker  | stickerOffset | stickerScale | transition    | text            |
| ---------- | -------- | ------------- | ------------ | ------------- | --------------- |
| window-1   |          |               |              | skid,         | This is the ... |
| window-2   | bubble-1 | 100,-75       | 0.75         | ,wipe         | First of ...    |
| window-3   | bubble-2 | 80,-165       | 0.75         | glare,vanish  | Then ...        |
The image and sticker columns contain image names that are loaded from your app’s bundle. stickerOffset and stickerScale allow you to position a sticker over the main image background.
transition is one of the available Pow transitions like skid, wipe, glare, vanish and more.
Finally, text is an optional description of the slide that is displayed at the bottom.
I really like using markdown tables for simple lists like this, especially when visually editing the data with TableFlip:

Displaying the walkthrough window
MarkWalkthroughModel reads the markdown data and creates an observable model.
Once you have that, displaying the walkthrough is as easy as inserting MarkWalkthroughWindow in your view hierarchy:
|
|
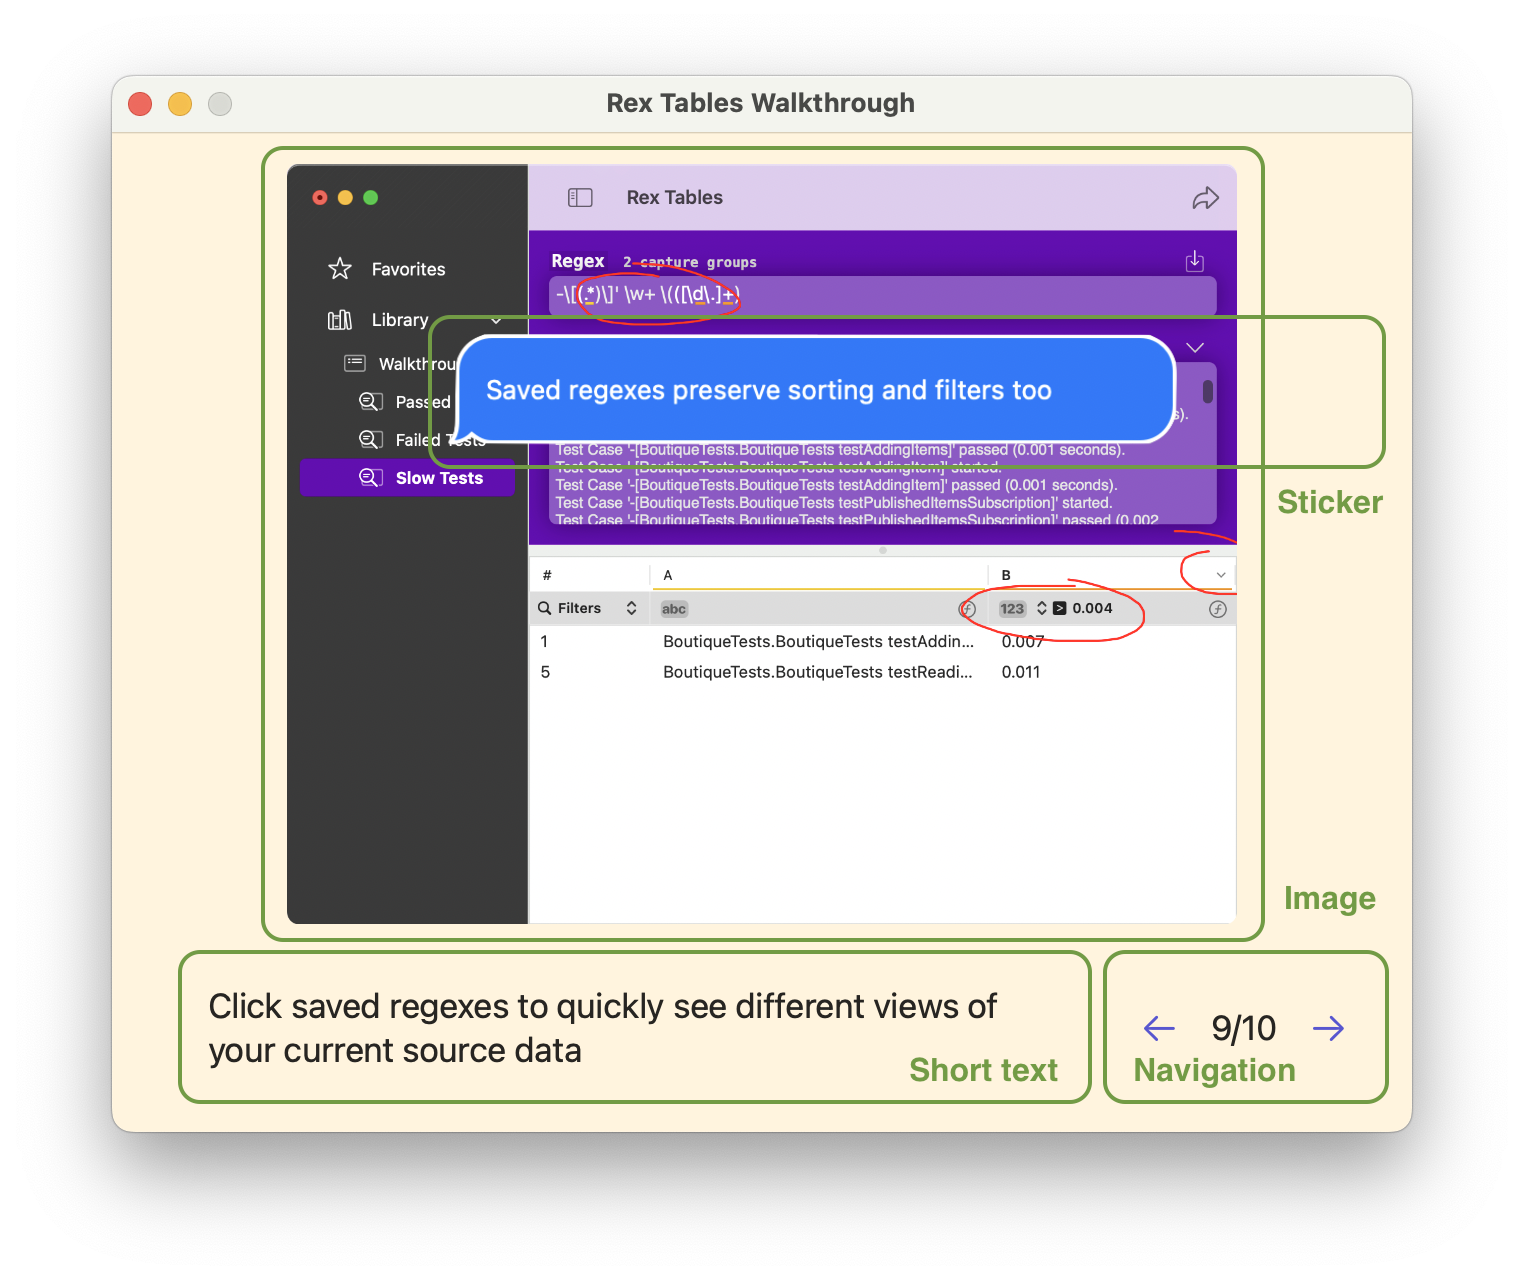
That code displays an interactive scene via SwiftUI that users can navigate back and forth:
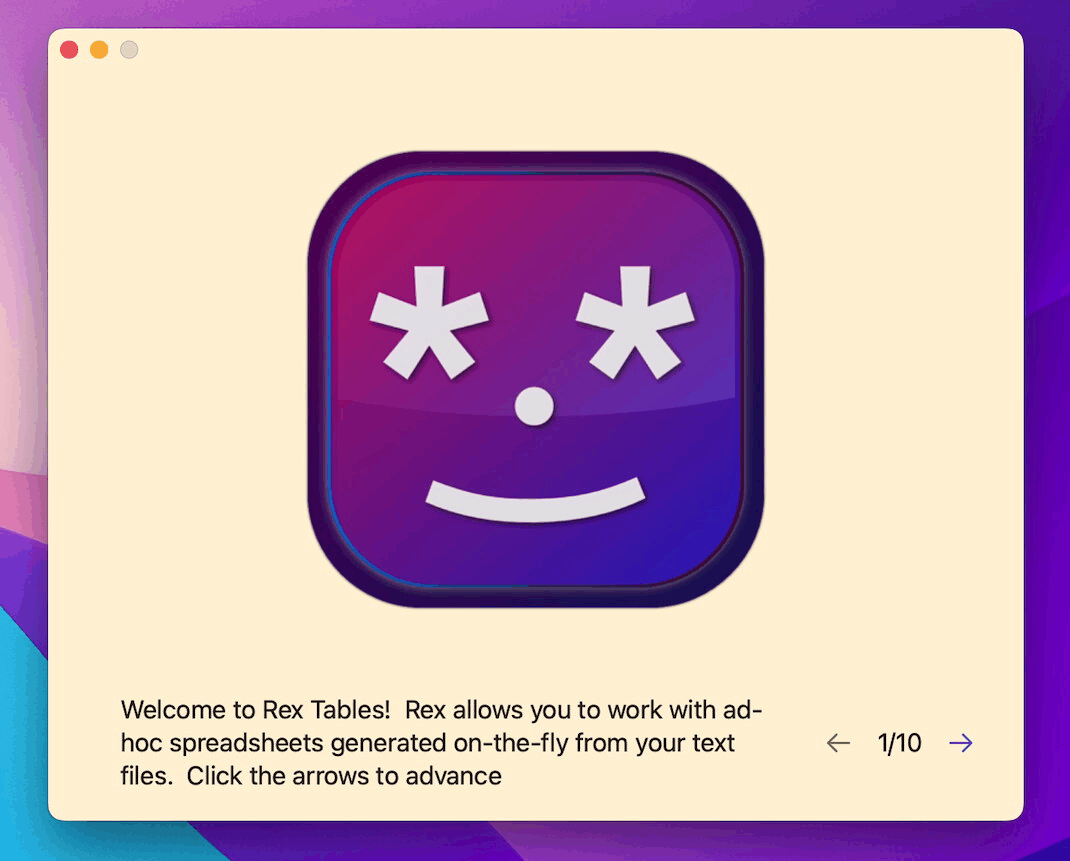
There are four main elements to display in the UI: background, sticker, text and navigation like so:
The package doesn’t do much more than just fuse the two packages MarkCodable and Pow together but you can still use it to put together quick slides or app walkthroughs.
You can get the package here: https://github.com/icanzilb/MarkWalkthrough.
Check out the Demo folder in the root of the repo which is Rex Tables’ actual walkthrough alongside with the original images and text.
Any thoughts, ideas, opinions on MarkWalkthrough? Let me know.
Get in touch at https://mastodon.social/@icanzilb.